How to Create Game Data File
To create a new game data file within the Unreal Engine Editor, open the Content Drawer, right-click in the desired folder, and select in the Create Advanced Assets section Miscellaneous → Game Data menu option. Name your game data file and proceed according to the instructions in the dialog window that appears.
Note
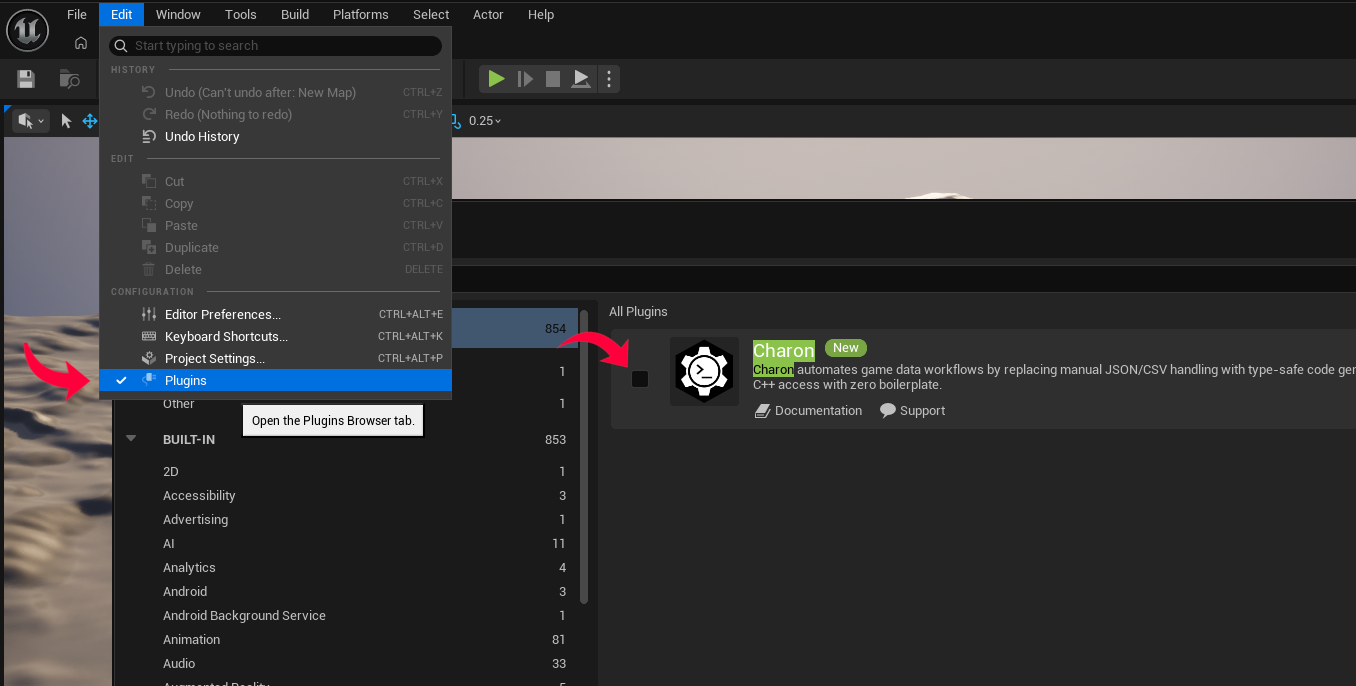
The plugin must be enabled after installation before the Game Data menu option becomes available. Open Edit → Plugins…, find Charon in the list, and check its checkbox.
Step By Step
Open Content Drawer: Open the Content Drawer window in the Unreal Engine Editor.
Select Folder: Right-click in the desired folder where you want to create the game data file.
Create Game Data: Navigate to Create Advanced Assets → Miscellaneous → Game Data from the context menu.
Name the File: In the Content Drawer window that appears, enter a name for your game data file.
Check for Errors: Ensure there are no error messages in the dialog window that opens, then press Next.
Wait for Module Generation: Allow time for the new module to be generated, watching the wizard in the dialog proceed to the next step automatically.
Review Summary: Check the summary and verify there are no suspicious errors in the Output Log window.
Recompile C++ Code: Use your IDE of choice to recompile the C++ code. Restart Unreal Engine Editor if needed.
Import Game Data: Reopen the Content Drawer window and click the Import button.
Select .gdjs File: Locate and select the .gdjs game data file you named in step 4, then click Ok.
Choose Game Data Class: Select the Game Data class, which should match the game data file name. If it’s not listed, return to step 7.
Save .uasset File: Save the newly created .uasset file after completing the import process.
Throubleshooting
Game data creation or code generation/compilation may encounter issues under certain circumstances:
Module Generation Fails on a Blueprint-Only Project
- Problem: The project has no C++ source yet (Blueprint-only), so there is no .Target.cs/IDE project for the wizard to add the generated module to, and module generation fails.
- Solution: Convert the project to a C++ project first, then retry. The easiest way is via Tools → New C++ Class…, picking any class (e.g. Actor), then Next → Create Class. This generates the missing C++ project files; the new class itself isn’t needed and can be deleted afterward.
Insufficient File System Rights or File Creation Errors
- Problem: Lack of sufficient rights to the OS file system, or errors during file creation (e.g., file name too long, antivirus block).
- Solution: Check the Output Log window for errors or the most recent log file in <project-dir>\Intermediate\Charon\logs and attempt to resolve them.
Class Name Collision Within Project
- Solution 1 (Game Data Class Name Collision): Delete the newly created .gdjs game data file and the generated module. Then, start over with a new name and clean your .Target.cs files from the generated module name.
- Solution 2 (Schema Class Name Collision): Open the game data in another editor (Online, Standalone), rename the schema, and try again.
No Game Data Class in Import Window
- Problem: The generated game data module is not being compiled.
- Solution: Ensure it’s added to your <project-name>.Target.cs and <project-name>Editor.Target.cs files as an extra module.
If missing, include following expression in both target files:
ExtraModuleNames.Add("<module-name>");
Additionally, verify that your .uproject file includes the generated module definition. If it’s absent, add the following module definition to the Modules list:
{
    "Name": "<module-name>",
    "Type": "Runtime",
    "LoadingPhase": "Default"
}