Creating a Custom Editor with React
Charon is a flexible data modeling web application that supports user-defined custom editors for fields and documents. By leveraging Web Components, Charon allows developers to seamlessly integrate reusable UI components that can be packaged and distributed via NPM.
This guide walks you through the process of preparing and packaging a Charon-compatible extension. It assumes proficiency with React and modern frontend tooling.
Introduction to Web Components
Web Components are a set of standardized browser APIs that allow developers to create reusable and encapsulated HTML elements. Core technologies include:
Custom Elements: Define new HTML tags using JavaScript.
Shadow DOM: Encapsulate markup and styles.
HTML Templates: Define reusable markup structures.
Web Components are framework-agnostic, making them ideal for embedding in applications like Charon.
Charon loads user-defined Web Components dynamically at runtime. Each component is registered via a known selector and associated with supported data types and usage contexts (e.g., form property, grid column).
Step-by-Step: Building a Logical Toggle Editor
This guide uses a custom logical toggle field editor as an example. You can download and try the example code referenced in this article.
1. Create a New React Project
npm create vite
> Project name: charon-logical-toggle
> Select a framework: React
> Select a variant: TypeScript

cd charon-logical-toggle
npm install
2. Install Required Dependencies
Install SASS, RxJS (recommended), the Web Components polyfill (for broader compatibility), and the Charon extension types package.
npm install sass --save
npm install rxjs --save
npm install @webcomponents/custom-elements --save
npm install charon-extensions --save
3. Write and Export Your Web Component
Follow a recommended guide for wrapping React components as Web Components:
Key points when writing your component:
Implement the
CharonPropertyEditorElementinterface in your Web Component to accept input properties from the main application.Ensure you correctly subscribe and unsubscribe when
valueControlordocumentControlinput values change to avoid memory leaks.Export your Web Component using a unique tag name (e.g.,
ext-logical-toggle-editor).Your
main.jsscript should only register the Web Component-it should not render anything directly.
4. Modify vite.config.ts for Packaging
Update the vite.config.ts file to control file naming and minimize output hashing:
import { defineConfig } from 'vite'
import react from '@vitejs/plugin-react'

export default defineConfig({
  plugins: [react()],
  build: {
    rollupOptions: {
      output: {
        assetFileNames: 'assets/[name].[ext]',
        chunkFileNames: '[name].js',
        entryFileNames: '[name].js'
      }
    },
    minify: false // Disable minification during development
  }
})
5. Update package.json for Packaging
Ensure your package.json includes the following:
A non-default version number (e.g.,
1.0.0).A
mainfield pointing to your generated JS bundle (e.g.,index.js).A
buildscript for bundling and packaging:"scripts": { "build": "tsc -b && vite build && copy package.json dist\\package.json && cd dist && npm pack" }
Include your stylesheet(s) in the
filesarray:"files": ["assets/index.css"]
Declare the Charon extension metadata using the
config.customEditorssection:"config": { "customEditors": [ { "id": "ext-logical-toggle", "selector": "ext-logical-toggle-editor", "name": "Logical Toggle", "type": ["Property", "Grid"], "dataTypes": ["Logical"] } ] }
Add the Charon extension schema reference:
"$schema": "https://raw.githubusercontent.com/gamedevware/charon-extensions/refs/heads/main/package.json.schema.json"
Remove the
"private": trueflag before publishing.Fill in metadata fields like
author,description, andlicense.
Debugging & Local Testing
Test Locally in Charon
Place the generated .tgz file in:
%PROGRAMDATA%\Charon\extensions\
C:\ProgramData\Charon\extensions\
/Users/<username>/.config/Charon/extensions/
/home/<username>/.config/Charon/extensions/
<project-directory>/Library/Charon/extensions/
<project-directory>/Intermediate/Charon/extensions/
This allows Charon to detect and load the extension during development, bypassing the NPM publication process.
Disable Optimizations for Browser Debugging
During debugging, set the following in vite.config.ts:
build: {
  minify: false
}
This improves source map quality and simplifies runtime behavior.
Versioning
Always increment the version field in package.json between builds to ensure Charon detects updates.
Publishing
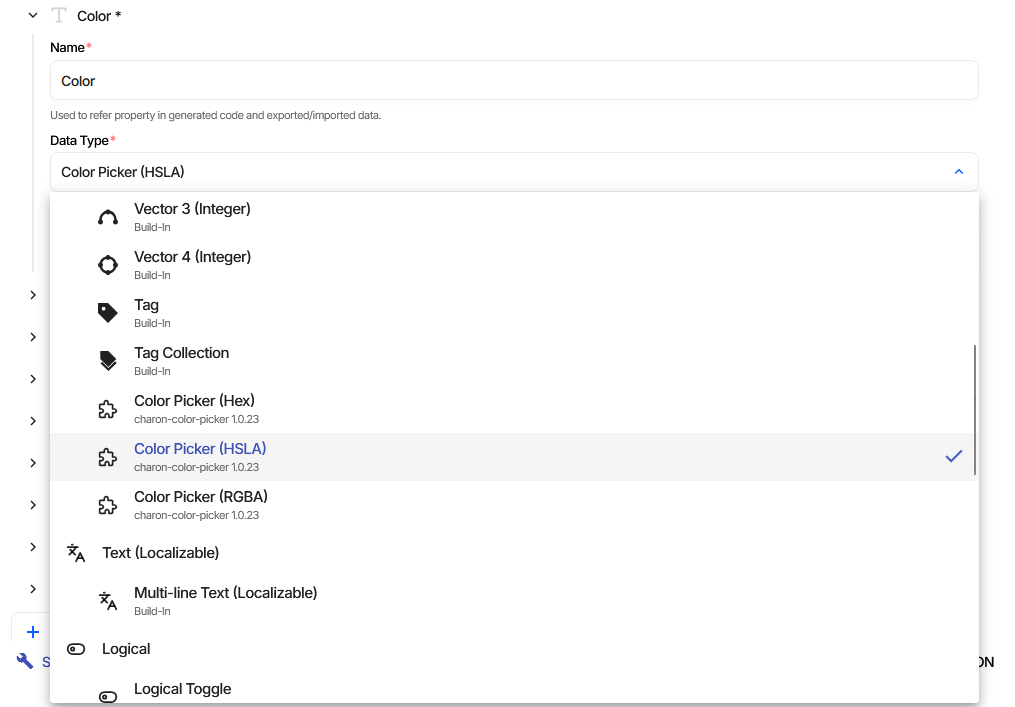
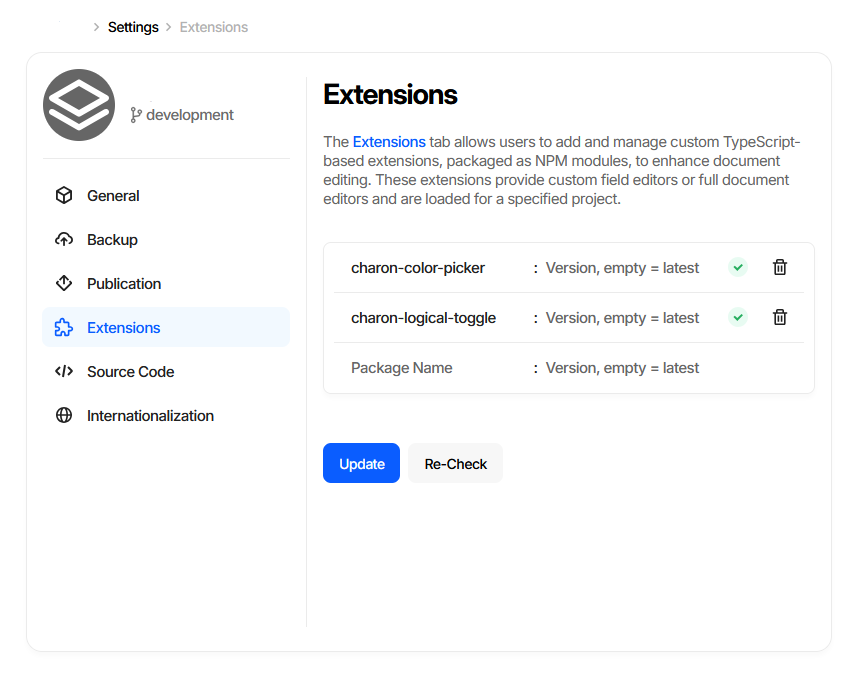
Once your component is built, tested, and versioned, you can publish it to NPM and reference it in Charon’s Project Settings → Extensions tab.
Your custom editor will then be available in the schema designer for relevant property types.